Saturday, January 30, 2010

fool proof sugar cookies

When I was pregnant with Bee, I realized that I didn't have a roll out sugar cookie recipe. How could I be a mom without a fool proof sugar cookie recipe? Isn't that something you are supposed to do with your kid.... make seasonal cookies with gobs of icing? At the time, it seemed as important as having bunches of clean, lovingly folded onsies. A friend from an online forum (that I used to spend way to much time on) shared this recipe and we love it. It has been important.... maybe not as important as having clothes for a baby, but close.

We usually do circle, because the kids get so frustrated when we can't ice their giraffe to look just like a giraffe.
Sugar cookies
½ c butter (room temp)
1 c sugar
1 egg
2-3 T milk
1 ½ t vanilla
2 c flour
2 t bkg powder
¼ t salt
Beat wet into dry. Mix well. Refrigerate 30 min. Rol out and cut out in shapes. Bake 375° for 7-10 min
------icing
¼ c butter
1 c powdered sugar
Salt
1 t vanilla

Oh goodness. They are good without icing, but are pretty ok with it too.


The dough also makes for a good fruit pizza crust too. The baking time might need to be adjusted. For the pizza 'sauce' I just mixed up some cream cheese and whip topping, but I think some added marshmallow fluff would be good too.


Friday, January 29, 2010

ode to the tribble

At a craft fair before Christmas, I bought a tribble. It's a round poofy type dish cloth thing. When I search tribble online, I find just as many sites about star wars. I have also found some calling this a 'spiral scrubbie'. One thing I love about craft fairs is that the makers of the items generally love their medium and are eager to talk about it. When I expressed some interest in the design behind it, she was happy to tell me all about it and even offered to write down the pattern. I love that she was eager to teach others.

So I bough one, but was happiest to go home knowing how to make one. You don't want to see a picture of the one I bought now, it's a little 'used'. I knew that if I could make it using that special dish cloth yarn instead of acrylic yarn and make it a touch bigger it would be even better.
I've been messing around with the directions she gave me and found it pretty easy to put one together. You start out by chaining on 20 stitches (keep an extra long tail). Then, you make a parallelogram by each row adding one increase at one end and a decrease at the other end. When you single crochet on the next row and just switch so that all the increases are on the same end and all the decreased are on the same end. Single crochet stitches are used throughout and the stitch is only done in the rear side of the previous single crochet. I should have taken a picture of that...
When it gets about 11 inches (for this extra large one), you just tie it off. I have found it helpful to make sure your ending tail is on the same side as the starting tail. Keep both tails long, like one at least 8 inches and the other at least 14 inches long.

Here's the only slightly tricky part. the end on the right and the end on the left get brought together to form a cylinder of sorts. Use one of the long tails to stitch the sides together.

You can see the dark green yarn that stitched this guy up. I just used my crochet needle to do this, but it would have been easier to use a yarn needle.

With the longest tail, weave in and out around the opening and pull tightly shut. Pull, pull, pull. Knot it up however it makes sense to you, as long as its nice and tight. These pictures were all taken in the Sew Cute crafting studio and I rather enjoyed the nice lighting (and good company).
Pull both tails to the open side. On the other open end, repeat weaving through the open edge. Tighten it up good and tight too. Knot it. If not already done so, secure it so that the tribble is connected in the middle. This perhaps looks and sounds a lot more complicated than it really is.


It's all ready for dishes. I have a lot waiting to be washed. Any volunteers?
I did search for a pattern online under the name tribble, but only found knit patterns. When I learned that it also goes by the name spiral scrubbie, I found a lot more out there. Here's a nice video on you tube that really shows what to do.

Thursday, January 28, 2010

felt bag finished- it's about time

After the last bag was done, I started immediately on this knitted one. My Grandma had mentioned that she was looking for a bag to use all winter that was both black and navy. This silly thing has taken me so long (because I have such a short attention span) and I saw at Thanksgiving that she had already bought a new purse. Maybe she can just use this one as a tote when she goes to card club or something. These pieces have been hanging out on my coffee table for far too long. Anyway, it's done.

Here are the wool knitted pieces just prior to the felting. I didn't take measurements or count anything this time. I just went for it. The blue piece and the grey and black piece are pockets to be stitched inside. The flowers and hearts and just some crotchet pieces I wanted to play around with.

Fresh out of the hot washing machine. Two washes and I was happy.


I tried something different with the strap for this bag. It's one long pieces and is just tied in a knot. The strap is laced all the way through, around, and through again.


Does that make sense? Here is an inside picture. Here are the two pockets sewn in too.


I wasn't liking the grey color. I though it was gym sock like. I'm ok with it now though.


I also was pretty happy with the flowers. I sewed the two different flowers together and attached them to my felted purse.


Oh, I do like that. It spruced it up a little.

I already have the wool for the next project. I'm done with the stripes, but getting some different colors with this wool. Isn't this delicious?

Wednesday, January 27, 2010

big soft pretzels, like you're at the mall.

Lou and Bee would go to the mall everyday if I let them. Pretzels. It's all about the big soft mall pretzels. They enjoy the carousel too, but it's mostly about pretzels.


Here's our home version:
Pretzels
Dissolve:
2 ¼ t yeast
1 ½ c warm water
add:
2 T brown sugar
1 1/8 t salt
1 c bread flour
3 c flour
Knead well.
Let rise 1 hour. knead again. Divide and shape 12 large pretzels.


Before placing on baking sheet, dip in bath.

Bath: 2 c warm water and 2 T bkg soda


Rise 20 min. Bake 450° @8 min. Butter and salt (kosher) tops if desired. Bee rolled all of these.

I shared this recipe once before, but not in pretzel form. Bee is a great pretzel maker and she was happy to demonstrate. She plans to get a job at the pretzel place at the mall. She can tell them she has years of experience.


Edited to add:  I have since discovered a secret for making them look great, at least 96% of the time. Full 'secret' post here.  


So the secret to pretty pretzels is adding an extra rise. After the dough rises and you divide it into 12 balls. Form balls into pretzels and (Here's the change:) rise again for 30 minutes. Then when you dip it in the bath water, they stretch out even more. Use both hands and use your fingers to spread them more. Then bake as directed.

Tuesday, January 26, 2010

quilt along- week 1

Week 1 for the quilt-a-long is choosing and preparing the fabric (found here @ I have to say)

Here's what was needed:

For the quilt top: 1/3 yard pieces of 10 different prints (for the rectangles)3-1/3 yards total
2 yards of a solid/neutral fabric (for the squares)
For the binding: One yard of a coordinating print
For the backing: Three yards of a coordinating print
For the batting: Two yards of 90" wide Warm and Natural batting

Here are my fabrics. I did what she recommended, I started with one colorful fabric that I loved (the flowered one- fifth from the left) and started matching from there. She also suggests just grabbing fabrics and narrowing down later. I grabbed 15. I took a few swatches from home because I really wanted to use up at least one or two pieces that I already had. The paisley mustard (number four from the left) and the green flowers in the middle are ones I already had. I chose unbleached muslin for the neutral that she asked for. The blue one that is 6th from the left will also be the binding. I'm getting a little nervous that I'm going to make this all crooked and messed up. This week was easy, lets see what next week holds.


So the assignment for week one is to select the fabric, wash and iron it. Check. So far, so good. next week is cutting... we'll see how that goes.

Monday, January 25, 2010

sushi- cheater style

One of my friends asked me last fall if I knew how to make sushi. I said "No, but I'll figure it out." I got a book at the library, but it was for the serious sushi chef type. This clearly does not apply to me. It did have some nice pictures. I talked to some other people and learned a little bit more.

I had a little extra money in the grocery envelope this month (not sure how that happened) and I decided to buy all the goodies and start testing it out. For the first try, I bought a kit. It included the wrappers and rice. You just added the veges and meat. Lou and I made up a bunch with crab meat and avocado.

The little wrappers were pre-cut. You just cooked the rice and started filling them up. Roll and trim the excess and you're all done.


They aren't the prettiest sushi I've ever seen, but they were yummy. Lou ate them almost as fast as I made them!


Here's what the kit looked like. I have the ingredients bought to make more sushi, not using a kit/cheater style. Hubby travels again this week so I think that will be the time. He agrees with Bee that they are disss-kusting!

Sunday, January 24, 2010

puddle jumping

It rained and rained and rained.

When you have rain boots and a rain coat it's OK.


Especially after you've been trapped inside the house all day.

If you jump enough, the water turns to 'chocolate water.'

Then your pants get wet. Nobody likes that.

New pants, new socks and an umbrella fix that unhappy situation.


Back to the chocolate water.

Wet again. No worries this time- Mama can fix it. I love you messy boy.

Saturday, January 23, 2010

Parfaits for my Loves

My Loves love parfaits, and since I love my Loves, I make them parfaits. Who am I kidding, I love parfaits too. It's a treat, but we do love them.

Cherry parfait. Or- Parkays, as Lou calls them:

Cherry Parfaits
1 pkg vanilla pudding
1 c sour cream
1 c milk
-mix together pudding, sour cream, milk
1 can cherry pie filling
1 tub whip cream
-layer pudding, cherries, whip topping -repeat
Chocolate banana parfaits
1 c milk
1 c sour cream
1 pkg chocolate pudding
-mix together pudding, sour cream, milk
bananas
cool whip
-layer pudding, bananas, whip topping -repeat
(I usually add shaved chocolate to the top, if I have it on hand)

Friday, January 22, 2010

valentines day shirt

I haven't been able to read a crochet or knitting pattern in the past. I could only do simple things, squares and rectangles. There have been cute things that I wanted to make and while I could do the stitches and could make something if someone walked me through it, I couldn't read a pattern. When I saw this crochet heart garland from Skip to My Lou, I got motivated. (The original heart pattern is from Suzies Stuff). I googled 'how to read a crochet pattern", and found this crochet basics page. I just flipped back and forth between the two and figured it out. 17 hearts later and I didn't even need the pattern. I did make the garland, but it's not hung up yet. I'll post a picture then.

I was trying to think of other things to use the hearts for and thought about making one out of wool and felting it. It could be a decoration on a felted wool bag. I'm going to be felting some things this weekend, so I'll write about that soon too.

Then I though about putting it on a shirt. The hearts stitch up in just a few minutes and are really sweet. I chose a red shirt from Bee's drawer and using a regular thread and needle, I hand stitched it on. To get it to stay put while sewing, I started in the middle with a few stitches and then went around the outside edge.


I tried three different yarns until I got one that was a good weight to work well on this shirt. The first two were too chunky.

Bee seems happy with it too.
Here's the pattern for the heart (from the above mentioned sources):

Round 1
Chain 4. Make all of the next stitches in the first chain. 3 trc, 3 dc, chain 1, 1 trc, chain 1, 3 dc, 3 trc, chain 2 slip stitch
Round 2
Chain 3, in first trc make sc and hdc, in next stitch 3 hdc, in next stitch 2 hdc, sc in next four stitches, chain 1 (then) dc in (the same) trc (then) chain 1, sc in next four stitches, 2 hdc in next stitch, 3 hdc in next stitch, hdc and sc in next stitch, chain 3 and slip stitch in center
Round 3
Chain 3 , sc in top of chain 3 from previous row , sc in each stitch all the way around (until chain 3 from previous row). At beginning of chain 3 from previous row chain three and slip stitch in center of heart. Pull the loop to the back and fasten off.

Thursday, January 21, 2010

focaccia and ruining dinner method #29

Just so you don't think that everything I make is great, here is a pan, previous and very recently on fire sitting outside of my house covered in flour. Organic whole wheat flour. I should have grabbed the cheap stuff for very fluffy baking. How to ruin dinner method #29.

I was making some corn meal crusted chicken and had the pan warming up. When I went to pour in some olive oil, the whole thing lit up. The pan was on fire. I remembered that you weren't supposed to use water, but rather flour to put it out. Water would have been easy since I had a sink full of dish water. It was suddenly extremely smokey and because there are about 30 plastic shopping bags stuffed in my stove exhaust fan, I was unable to work on the smoke. Hubby happened to be in the kitchen with me and opened the back door. The fire was high and the pan was so hot. I set it down outside and grabbed a jar of flour. The next thing I knew, the fire was out and I had emptied almost the entire jar of some organic whole wheat flour that I splurged on.


The pan cleaned up ok, but the patio is pretty stained. I thought the snow would have taken care of it, but it's snowed and melted, and it's still there.

I started the chicken in a new pan and all was well. I had the flour out because I was making some focaccia to go with the chicken. I don't make it often, but when I do, we wonder why I don't make it more often. It's so tasty and can easily be doctored up just the way you want.


Foccacia
2 ¼ yeast
1 c warm water
-dissolve the yeast in warm water. Add the following
2 ¾ c flour
1 t salt
1 t sugar
Knead and let rise 1 hour. Knead again and roll out about 3/4 inch - 1 inch thick. dimple with your knuckles. Let rise 20 minutes. Dimple again. Top however you want. A drizzle of olive oil and herbs and parm are nice. Tomatoes or other thinly sliced vegetables and other cheeses work too.
----topping
2 T olive oil
1 t garlic powder
1 t oregano
1 t thyme
½ t basil
1 t rosemary
2 T parm cheese

Bake 425° 15 min

Focaccias are all over grocery store bakeries right now. They offer a wide array of seasonings, herbs and toppings. What are your favorite toppings?

Wednesday, January 20, 2010

What to make with it Wednesdays

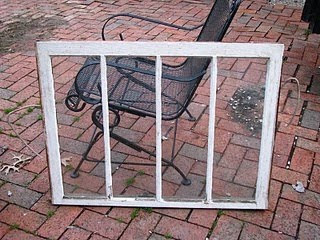
Carole, at Sew Cute, has started a new (hopefully weekly) feature called What to make with it Wednesdays." You can link up and share something that you need a little crafty inspiration with. Then others, with fresh crafty minds can give you some much needed direction. I need to take some pictures for next week, but I linked up an old request for inspiration. Remember the car interior leather stuff my dad sent? It's still sitting in a tub in my sewing room.

Carole shared these window she snagged from someone replacing their windows.


If you have some ideas for the windows, my car interior leather, or need some ideas of your own for a project you are stumped with, head on over to Sew Cute.

Tuesday, January 19, 2010

fortune cookies and egg drop soup

Oh man, I love Chinese food. oh man.

Like most other foods that I love, I've tried to come up with an at-home version. You won't mistake this egg drop soup for some from the all you can eat buffet, but we do enjoy this healthier version. It's simple and makes a good last minute meal.

Egg drop soup
chicken broth or stock
egg whites
salt to taste
flour or corn starch
green onions (if you like that, yuck)
- bring stock to boil. Add some flour or cornstarch to thicken soup. I use my immersion blender to really get it mixed well. Beat egg whites in a bowl. Bring soup back to a boil. Slowly pour the eggs into the soup while using a fork to whip the soup. This breaks the egg up into the wispy white stuff you find in egg drop soup. Experiment with how fast you stir to break up the egg so you have some thicker pieces and some thin little wisps. The eggs cook in just a few seconds, so it ready to serve right away, although I usually let it boil another minute. I'm pretty sure that they add yellow coloring in restaurants, we don't bother.


I never knew you could make your own fortune cookie, so when I saw directions for it, the kids and I got right on it. The recipes and great directions come from Alpha Mom. They were shared there by my new friends (although they don't know that we're such good friends) at skip to my Lou.

The kitchen staff was thrilled to have a fun project to work on.

They even included printable fortunes. I think this is what we'll make for Bee to pass out at school on valentines day.

They were pretty tasty too! Mine never got as hard and crispy as it sounds like they should have. I did seal them up at some point. I'll have to try again.