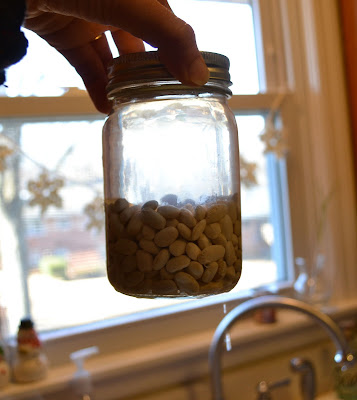
I sometimes hear from readers with questions about something I have posted. Probably the
questions I get most are about canning. Honestly, I've only been canning about three years, so I don't have all the answers. I have canned though a number of different things and am several hundreds of jars into this, so I do have a little I can share about the process. (Here's a link to all my canning posts) As with most new things I dive into, I've really read up on it, both in books and sources online too. That disclaimer aside, I'd thought in this 'off season' of canning I'd share my winter canning- dried beans. They are easy and excellent for a beginner, although they do use a pressure caner, which is admittedly scary at first.
You can can about any dried bean. I get mine from the food co-op in town. They sell dry goods in bulk at great prices. I can get dried organic black beans for $1.62 a pound, which I think is close to what you can get a sack of 1/2 pound of non organic beans for at the grocery store. I like canning beans because you get the convenience of canned beans but the budget savings of dried beans. It's always great also to know exactly what is in your jar/can of food. They are delish too, so that's a plus.
So, it's easy, like I said.
1. To get started, you need to clean your jars. If I'm pressure canning (beans, meats, vegetables) then, I just wash my jars and lids in hot soapy water. If I am using the water bath method (fruits, jellys, jams, etc) then I boil the items to sanitize them.
2. Set out all of your supplies. Some canning is a fast paced process, beans not so much. Your jars will need lids and rings. I always always use new lids, rings can be used a million times. I also sometimes use reusable tattler lids, but that's for another post.
3. You will need a pot of water boiling on the stove to add to the jars in a few steps.
4. I also go ahead and get the canner started. Follow the directions for your particular canner. Mine is 33 years old and was purchased by my mother in law along with a watermelon. We have the original receipt still in the box. Mine calls for two inches of water. I go ahead and turn the heat on and get this warmed up- without the lid.
5. On to the beans.... Rinse dried beans in water.
6. Pick out any funky ones. They look a little like raisins. I don't really want to eat those.
7. I only can beans in pint jars, because that's what works for us. Each pint jar gets 2/3 cups of dried (rinsed, so they are damp) beans. I don't level off the cup, it's usually a little rounded on top.
8. optional: add 1/4 teaspoon salt. I usually just add a sprinkle of salt, not even the full 1/4 t. (that little jar is my salt shaker... it almost looks like I'm really adding an inch of salt to a jar!)
9. When you have all your jars measured out, it's time to add the water. My canner holds 7 jars, I think that's probably a standard number. I am canning black beans and white navy beans. One jar is even mixed because I had a little left over of each. I guess it can go in soup some time.
10. Add boiling water slowly leaving 1 inch of room at the top. I say add slowly because I like to give the water time to get in and around all the beans.
I usually tap the jar gently to get rid of any air pockets. 1 inch from the top, means, 1 inch from the very tip top of the opening of the jar.
11. Wipe the rim with a dry cloth.
12. Add clean, dry lid.
13. Add ring. tighten a bit, not too tight, not wobbly loose either.
14. Set it in your canner. Get the others ready.
The black beans always make the water a funny black/blue color.
The white beans don't seem to do that at all.
15. When all the jars are ready to go, put the lid on the top and fasten securely.
16. Add the weight thingy, if your canner has one. I think new ones do something different. Turn the heat on as per your directions. I know about how hot my burner needs to be to get the weighty thing to jiggle. Beans go for 10 pounds for 75 minutes.
For my canner, that's 75 minutes after the jiggling starts.
17. When the 75 minutes are over, remove from heat. But for the love of all things wonderful, don't open it. Don't try to open it. I think most have a safety feature so your can't open it. Wait until it's cooled off and the safety latch releases. Mine is at least an hour. Then, remove your jars. When the jars are all cooled off, another few hours, check the lids to make sure everything sealed properly. You do not have to store the jars with the rings on, so go ahead and remove those. If one didn't seal (it happens occasionally) put it in the fridge and use in the next few days. It is likely that your jar has a tiny chip on the top.


1 comment:
Love canning beans this way. No need to pre cook as so many other posts I have seen. I add about 1 T of my homemade taco seasoning mix to pinto beans for refried beans and part of my black beans for a spicy quick Mexican inspired dish.
Post a Comment