Friday, August 31, 2012

preschool things


Here's a few other preschool things I've been working on to full our shelves during our morning table activities time.  I saw this apple stringing activity somewhere.  I went back to check on pinterest and I can't find it anywhere, so maybe that's not where I saw it.  I know I didn't think it up. Maybe someday I'll be so clever.


Red pom poms get a brown plastic pony bead hot-glued on the top with a little green felt scrap.  As long as you don't smoosh the bead down into the fluff when you glue it, a lace can run through the bead.


It's hard to keep anything pom pom or pipe cleaner made sitting out in our house.  The cat think she's a dog and plays fetch. 


I've been saving little plastic containers with screw top lids, I wasn't sure what I had in mind, but I was envisioning containers that could be filled and dumped and the lids screwed on and unscrewed and dumped again.  I have several ready, but  don't think this activity is ready to go yet.  Bee and Lou have been playing with it  though.


My dad sent me home from my last visit with four boxes of shells.  He's a collector of things too.  I turned a bunch into activities for school.  Some medium shells became a stringing activity.  A lot of them already had holes, from critters I guess.  Others, I drilled holes in with a regular drill bit. 


A bowl of rather smaller shells became a transfer activity with a set of tweezers/tongs.


The very smallest shells became a spooning transfer activity.


Some neat large ones became pieces for our loose items table at home.  This is the favorite activity at home right now so I'm sure it'll end up at school sometime.  I'll take some pictures of this for tomorrow.


Sorry it's been a little heavy 'preschool' themed over here, but school starts right after labor day so I've sort of been in school mode for a little while now.

Thursday, August 30, 2012

my little sad heart


My heart was crushed a little last night.  Lou asked me to please buy snacks at the store instead of making them myself (his class has a morning snack that each child brings for themselves).  He said people in his class stare when he gets out his homemade snack.  Apparently all the other mothers are buying them. 

I told him I would take him to the store in a few days to pick something out.  My little sad heart is still sending him homemade friendship bread for snack tomorrow.  He's just out of luck for a few days. 

It took me back to the day Bee told me she didn't want me to make any of her clothes anymore, she wanted store bought like the other girls. 

Maybe we need new friends! 


unrelated photo:  Lou making pancakes.  He probably wants those store bought now too.  

unrelated comment about above photo: I want to paint those cabinets, but I am so worried it's going to be a ton of work.

also:
I added photos to the race day post last month.

Wednesday, August 29, 2012

the closet tunnel


Because the kids asked and because I always wanted one with my brother, we convinced hubby to build a tunnel between the kid's closets. I was just as excited as the kids.   


It's big enough for them to squeeze through.  I went through once, but will not do again unless there is a fire in front of Bee's room and I just happen to be locked in the closet.


Bee and Lou spent an entire weekend hiding in their closets playing back and forth.  The poor cat was forced to play too.  It almost made me not remember all the closet stuff that was now spread around their bedrooms.


They even tried spending a Saturday night in the closets.  They both made them up like 'apartments' they called them.  Bee took a lamp in hers. She rigged up the door handle with a scarf so she could pull her door shut without getting out of bed.  Lou took in a fan.  They tried about 20 minutes and then decided they should sleep in their beds and just play in the closets.


Someday when we sell, house lookers are going to be like, "What in the world?" but I bet their kids will know exactly what to do with it.

Monday, August 27, 2012

nature cards -revised


We had to re-do the nature frames.  We made them last time with contact paper and several got mushy.  We gathered new items, pressed them for a week or two between paper towels and book, then laminated them with my thicker lamination.

This locust wing is pretty cool.


I found this yellow feather under the clothesline. 


These flowers are from a little bush in the backyard. 


The dandelion turned out great. 


They were fun in our kitchen window, but from the backyard looking in, they looked like that plastic winter covering some people put on their windows.   Hubby requested I take them down.


Then we tried them on the light box and really liked them.  


Even the regular leaves turned out super cool.  This method took a little more time to allow for pressing and drying, but has been worth the short wait.  Bee would like us to keep an eye out for some butterfly wings.  Those would be pretty too.

Sunday, August 26, 2012

chopping wood


Lets call it a gross motor activity, but we've found that Lou is a little more calm during the day if we let me get a little energy out with some big muscle activities.  


He needs to run, swim, ride his bike, and I guess chop wood.


He's been asking, begging to use the ax. He wants to carry it as part of his Indian costume, but that's not happening.


Don't freak out, he's pretty much supervised.  More so than we uses the stoveIf it helps him chill out and have a little more self control, I'm all for it.


Saturday, August 25, 2012

lined zipper pouch tutorial


This tutorial is mostly for my youngest sister.  She asked me to make her a few zipper pouches to take to college with her and I'm always happy to do that type of project, but I know it's something she could do too. I took pictures while I made them so she could see and maybe make her own.  Or, I'll keep making them for her.  Either way, it's cool.


I love making zipping pouches.  They are pretty easy and look pretty impressive when they are lined. 


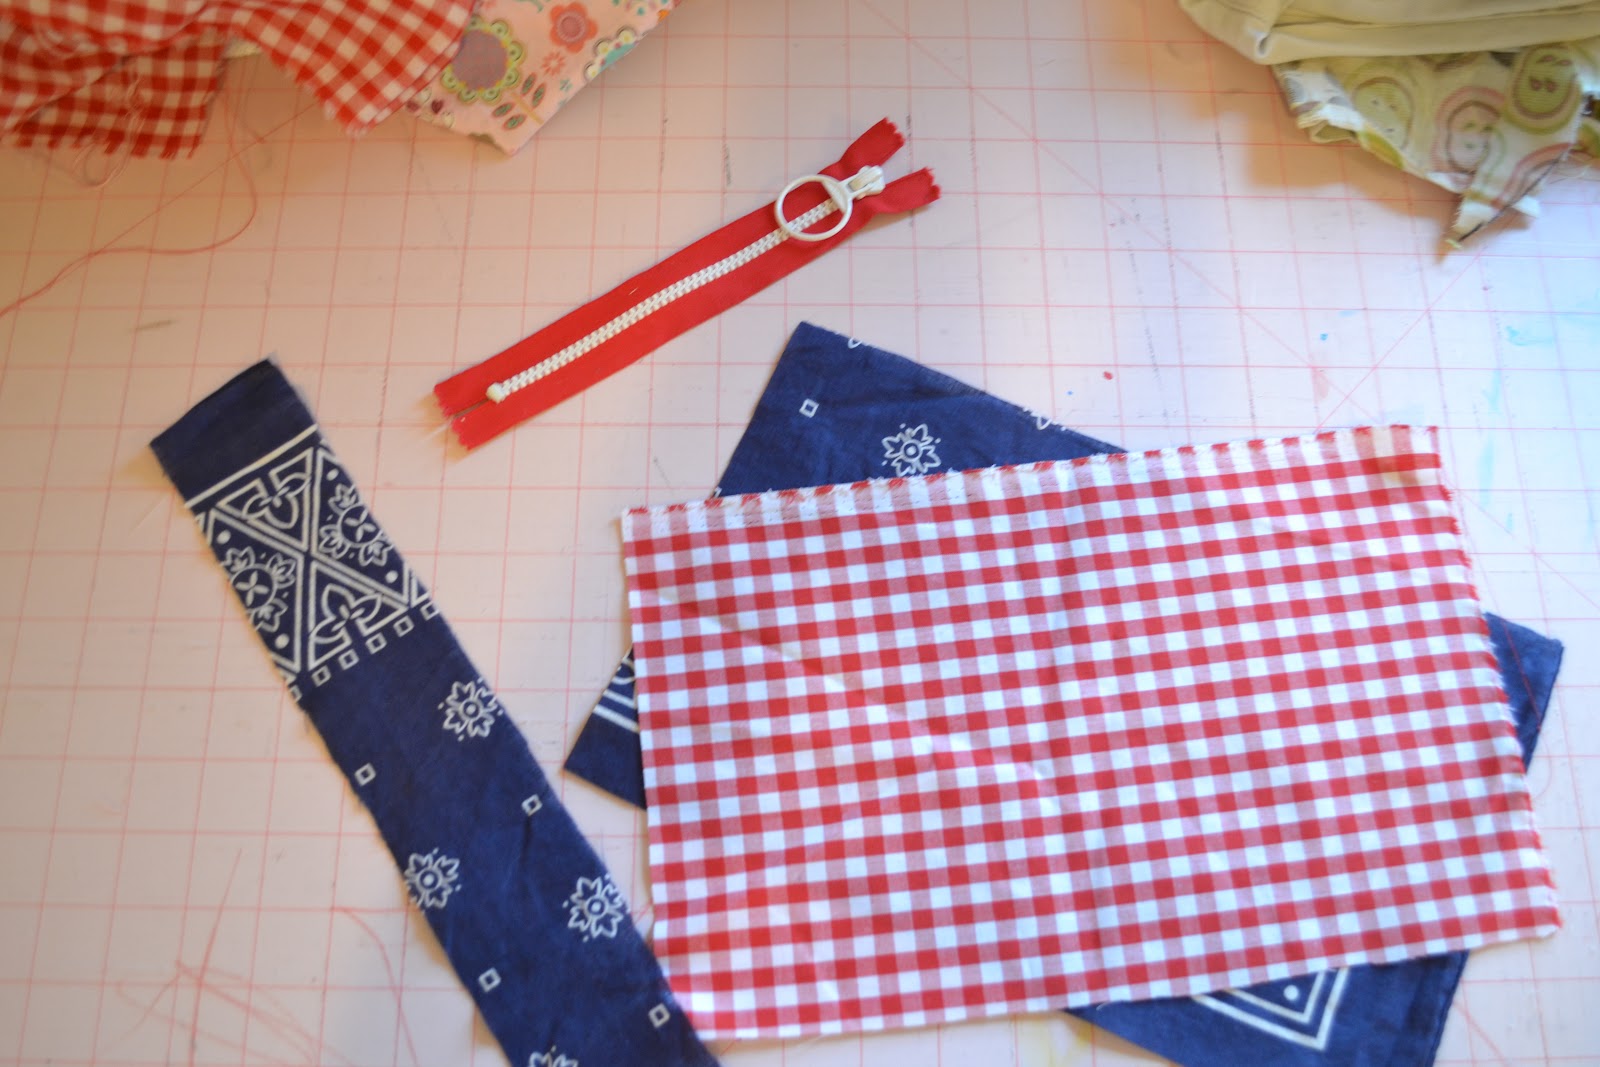
If your sister won't make them for you, you'll need two pieces of fabric, an outer fabric and a lining.  You'll need a zipper of course, I like a plastic teeth zipper, not metal.  I usually use one way longer than the pouch I'm making and just cut off the extra later, but this is what I had on hand.  Also, if you'd like a handle, you'll need a strip of fabric for that.  The sizes all depend on how big you want your pouch.   Generally, you're using a rectangle.


If you want some decoration on the outside, add them now. I did a ruffle on this one.


Then I went ahead and made the strap.  You can fold it up however you want.  I folded my strip in half and then opened it up and folded each edge into the middle again and folded it up like a sandwich.  Iron, pin,


and sew.  I like to make two lines of stitches, one towards each edge. 


Here's my zipper.  It's a big fat one and perfect for this picture taking session.


Lay out the piece of interior fabric (for me, the blue bandana), right side up. 


Then lay the exterrior fabric (for me, the red gingham) on top of the zipper, right side down.  You've made a zipper sandwich.  The top of the zipper is in line with the tops of the fabrics.


Pin and sew.  I move my needle over to the left as far as it with go so that I can sew close to the zipper.  

You are sewing to the right hand side of the plastic teeth. 


Can you see how I'm pressing with my finger to show where the zipper teeth are and the edge of the foot.  Sometimes people switch to a zipper foot, I don't bother. 


Flip it over to make sure everything got laid right and lined up right and looks ok.  Check the back too.


Press and sew to make a nice top stitch.  


Move that needle back to center.  


Sew close to the edge of the fabric where it meets the zipper.

Lay out the pieces out. 


Now we're working on the other edge of the zipper.  Bring the interior fabric up to the zipper and place the right side of the interior fabric is against the backside of the zipper.


Bring the exterior fabric up the zipper, right side to the front side of the zipper.  


 You've made another zipper sandwich. 


Pin and sew with the needle moved to the left again.


You've made a figure eight.


Check out both sides and make sure everything ended up alright. 


Flip it around so that you can make the top stitch on the other edge of the zipper. 


Press and top stitch.


Yep, it's going alright.


Now, open the zipper at least half way. 


Lay out the fabrics so that the interiors are together and the exteriors are together.


Line up the zippers ends on each side.  the only hard side there is the zipper open side, but you have to leave the zipper mostly open.


Pin.  stitch around the pouch edges. 


Note where you do not sew, the blue circles.


You are leaving a spot open in the exterior fabric for the handle and a larger spot in the interior for the flipping process.


Don't be afraid, sew right over the zipper.  Just don't sew over the end pieces with are extra thick and hard.  I am pushing the blue fabric over just a tad to check and see where the zipper end is so I don't hit it.


It doesn't matter how exactly your cut out the interior and exterior fabric to match each other at the beginning, at some point they get a little out of whack and now is when you even them up.


Now, let's add the handle.  I like to sew it together before we do anything with it.


Insert the loop part of the handle into the exterior fabric opening. Insert it up the sewn line.  Now sew the fabric back together right over the handle.


Locate the opening left in the interior.  This is going to be some crazy flippping.  It's going to seem wrong at first. 


Your cat may be as helpful as mine is.  My little girl sits on my desk when I sew and helps. She eats pins.  It's not really that helpful actually.


Flip it until it's inside out.  If you didn't leave the zipper open, now is when you're going to see that it was really important.  Told you so. 


Then turn it right side out.  


Check all the seems, make sure it's all working out alright.


Now, slip that lining back out and locate that opening.


The correct way to close it up would be to do a hidden stitch here, but I just sew it on the machine.  


 Sew close to the edge. 


Push the lining back inside and really point the corners.


Fill it up with goodies.  


 This is what Bee put in hers- kleenex, a little animal, three of my hairbands, and a vending machine container. 

Here are the three for my sister.  I ended up adding buttons to the pouch above.


You can do anything to the pouch to decorate it. 


I also sometimes like to add corners to the bottom to make it a little bit of a stand up guy.


That's just one more little step in the construction, but adds a lot.  There's so much possibility for these little guys. 


Let me know if you use this tutorial and have any luck.  I tried to write it out as easily as I could.